
How can we help you?
Section 10 : Automation & Workflows
Tchoum Growth
Section 10 : Automation & Workflows
I.Creating workflows
To create a workflow:
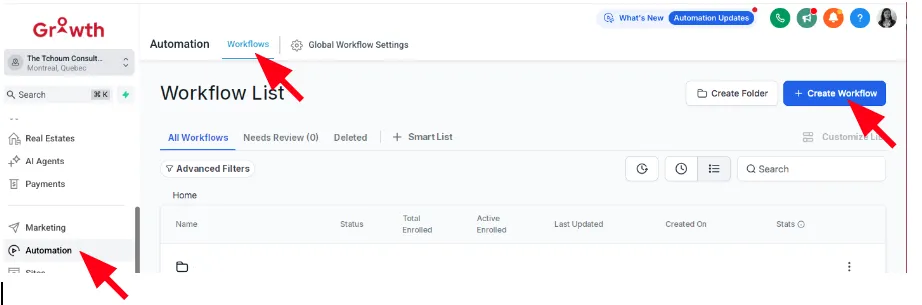
Go to Automations > Create Workflow.
Choose a trigger, such as a form submission or a new contact being added.
Add actions, such as sending emails, updating CRM fields, or assigning tasks.
Save and activate your workflow.
II. Using pre-built automation templates
To speed up workflow creation, use pre-built templates:
Go to the left menu and click on: Automation > Workflows
Click on the "Create Workflow" button (top right)
You’ll see a popup with several options:
✅ Select a Recipe ← (this is where pre-built automations live)
• Start from Scratch
• Vehicles Based Workflow (Beta)
• Real Estate Based Workflow (Beta)
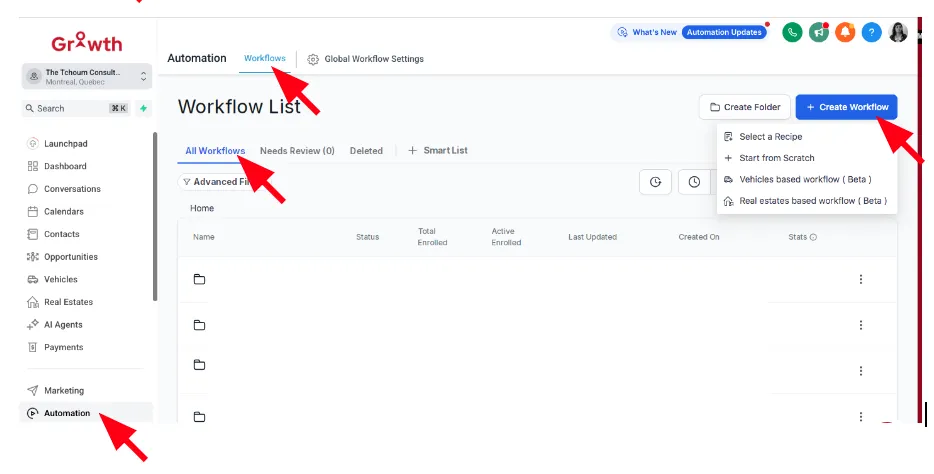
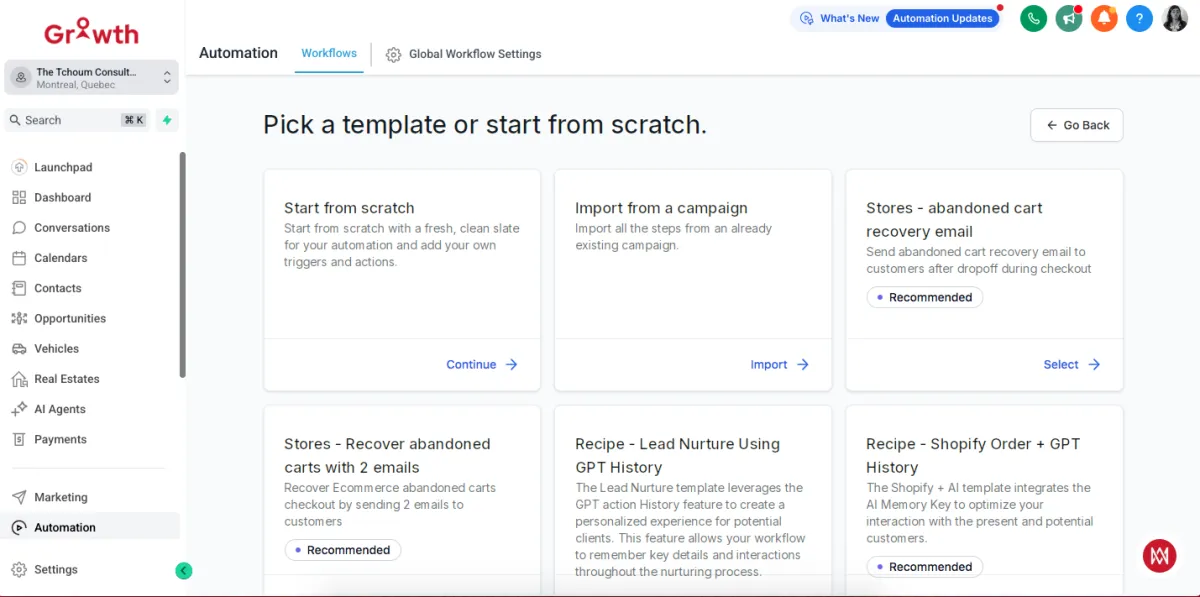
4. Click on “Select a Recipe”
→ This opens the library of templates categorized by use case (e.g., appointment reminders, lead nurture, follow-ups, missed call texts, etc.)
III. Branching workflows
How to create Branching Workflows:
Go to Automation > Workflows
•Click “Create Workflow” or open an existing one.
Add a Trigger
•Example: “Form Submitted” or “Tag Added”
Click “+” to add a step
•Select “If/Else” from the list of actions
Set your Condition
Examples:
•If contact has a specific tag
•If contact email contains "@gmail.com"
•If custom field = "Yes"
•If appointment status is "No-show"
You’ll now see two paths:
•Yes branch → If the condition is met
•No branch → If the condition is not met
Add different actions to each path
•You can send different emails, assign to different teams, or even apply tags depending on the branch.
•If you're not seeing "If/Else" in your Growth workflow builder, here are the possible reasons and how to fix it:
Make sure you’re inside the Workflow Editor
•Go to: Automation > Workflows
•Click on an existing workflow or click “Create Workflow” > Start from Scratch
•Inside the workflow builder, click the “+” button to add a new step
Search for "If/Else" in the Action List
•When you click “+”, a menu pops up to choose an action
•In the search bar, type "If/Else"
•You should see:
🔹 If/Else — (Create conditional branching)
If it still doesn’t show:
Your user role might not have full access added.
**
**Some roles or sub-accounts may be restricted by permissions.
•Go to Settings > My Staff > (your user) > Permissions
•Check if “Automations” and “Advanced Workflow Features” are enabled
Are you using a Workflow Recipe that hides this by default?
Some pre-built templates come with limited steps. Try this:
•Create a new workflow:
🔹 Create Workflow > Start from Scratch
•Then click the “+” to add a step
•Search for “If/Else”
IV. User behavior triggers
Go to Automation > Workflows
•From the left-hand menu, click Automation
•Then select Workflows
Create a New Workflow (or open an existing one)
•Click “Create Workflow”
•Choose Start from Scratch (or select a recipe)
Add a Trigger
•At the top of the workflow builder, click “Add Trigger”
•In the trigger library, scroll or search for a behaviour-based trigger, like:
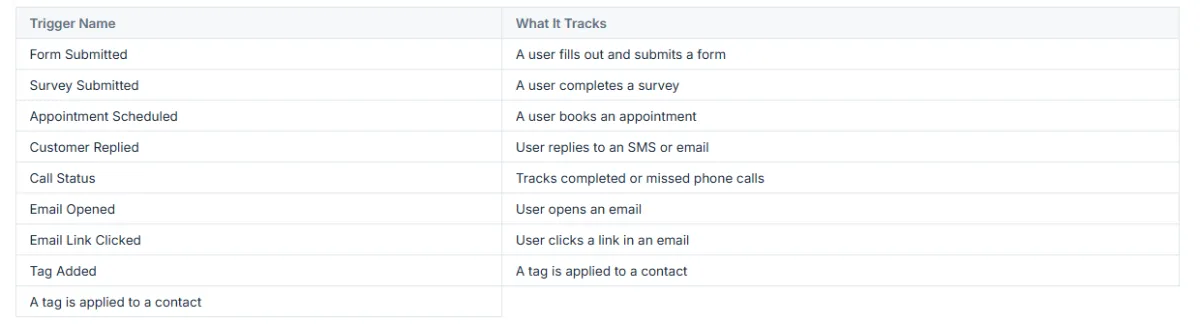
Select your trigger and click "Save Trigger"
Add Workflow Actions
Now that your workflow knows when to start, you add steps such as:
•Send SMS or email
•Add tags
•Assign to a pipeline or user
•Create delay/wait steps
•Conditional branches (If/Else)
Click the “+” button in the flow to add these.
Publish the Workflow
Once your steps are in place:
•Click “Save”
•Then click “Publish” (top right)