
How can we help you?
Section 12 : Forms & Surveys
Tchoum Growth
Section 12 : Forms & Surveys
I.Creating custom forms
To create custom forms:
① From the left sidebar, go to:
Sites > Forms > Builder (sometimes labeled as Form Builder).
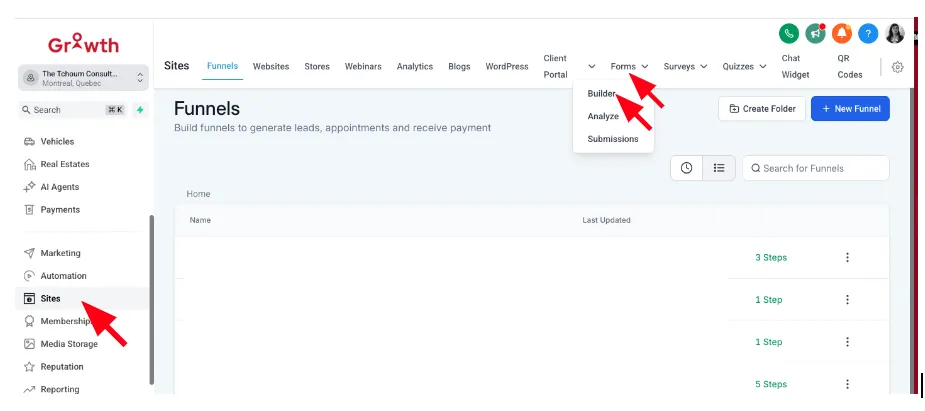
② Click on “+ Add Form”.
A blank form canvas will open with a drag-and-drop builder.
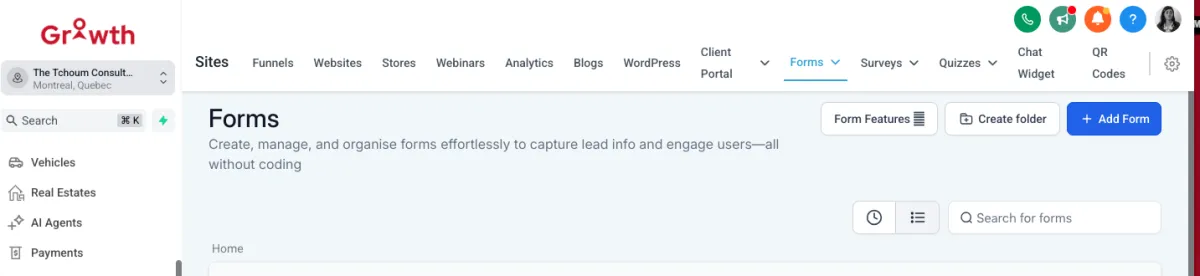
③ Drag and drop fields from the left panel into your form.
Common fields include:
•Full Name
•Phone
•Custom fields (if you've created any)
•Radio buttons, checkboxes, drop downs, etc.
④ Edit Form Settings
Click on the “Options” tab at the top to configure:
•Form Name
•Redirect on Submit (e.g., a thank-you page)
•Message on Submit
•Sticky Contact (auto-fill for returning users)
•Style settings (optional)
⑤ Save Your Form
•Click “Save” at the top-right.
•Your form is now ready to be embedded or used in workflows, funnels, or websites.
II. Embedding forms into your website or funnels
Embed on a website or external page
① Go to Form Builder > Integrate, then copy the embed code.
② Paste the code into your website or funnel page.
III. Using form submissions for lead capture
Embed on a website or external page
① Create a Lead Capture Form
Go to Sites > Forms > Builder.
Add fields like:
•Full Name
•Phone
•Any custom questions (budget, service interest, etc.)
Save and name the form clearly (e.g., “Lead Capture – Real Estate”).
② Add the Form to a Funnel, Website, or Landing Page
•Go to Sites > Funnels or Websites.
•Choose a step and drag in the Form element.
•Select your lead capture form.
•Publish the funnel/page.
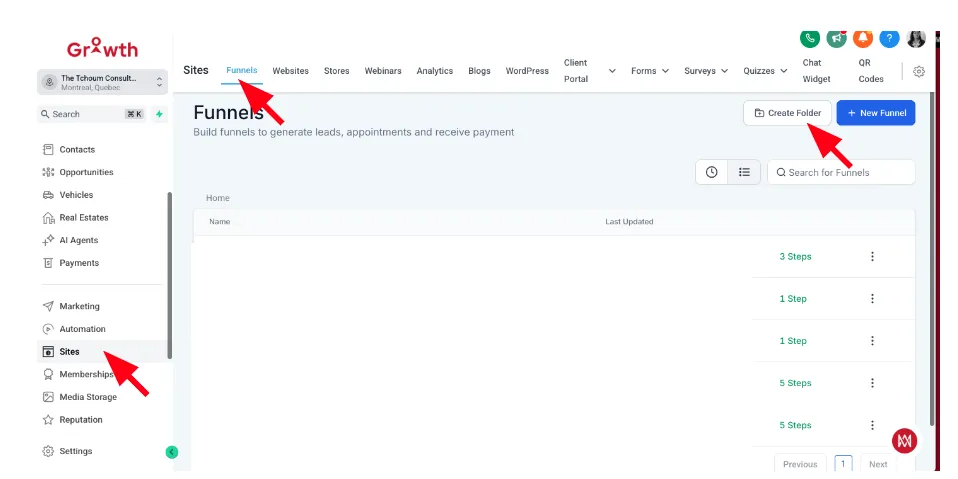
③ Trigger a Workflow When Form Is Submitted
To automatically act on form submissions:
Set up a workflow:
① Go to Automation > Workflows.
② Click + Create Workflow > Start from Scratch.
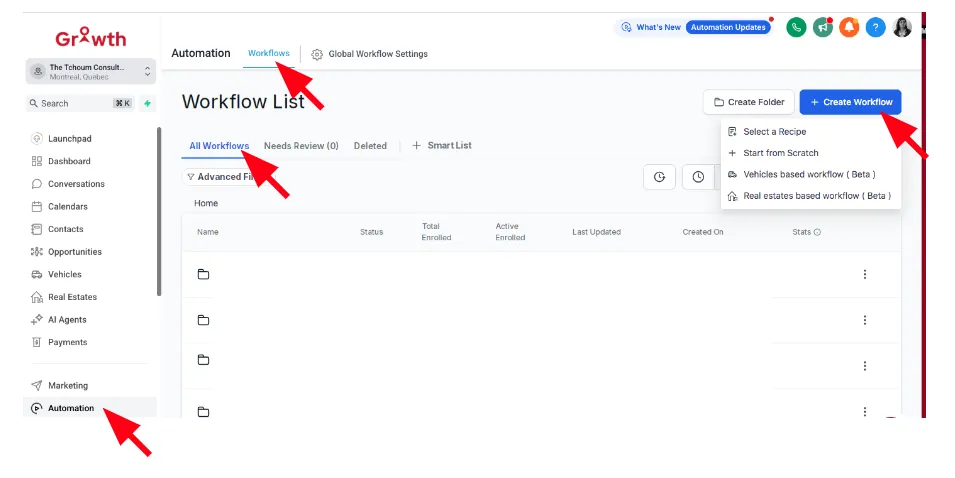
③ Add a Trigger:
Choose: Form Submitted
Select the correct form (e.g., “Lead Capture – Real Estate”)
④ Track and Manage Leads
Go to Contacts to see leads with form data.
Use filters or tags to segment.
Leads are also visible in Opportunities if added to a pipeline.