How can we help you?
Section 16 : Team & Collaboration
Tchoum Growth
Section 16 : Team & Collaboration
I.Adding users and setting permissions
To add a user to your account:
① Go to Settings > My Staff > Add User.
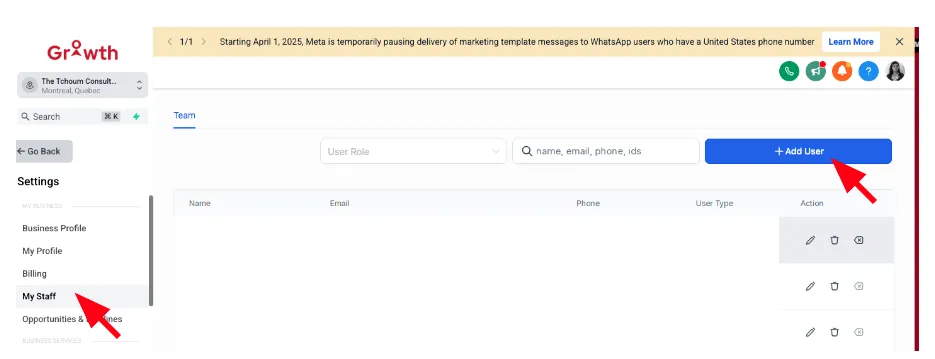
② Enter the user's details and assign them a role (e.g., Admin, User).
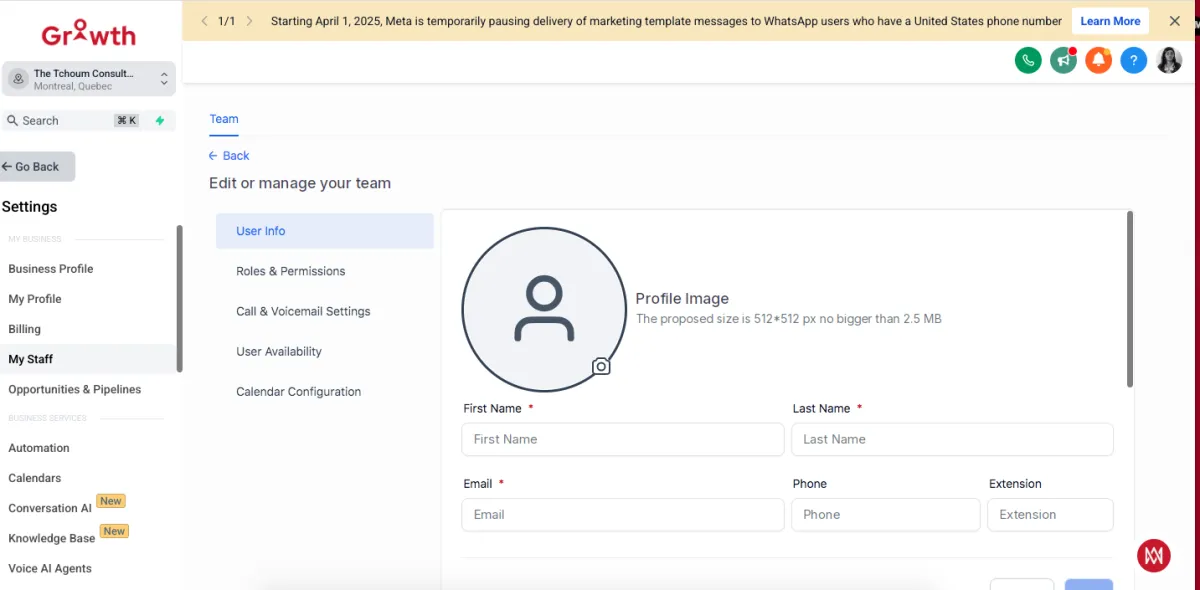
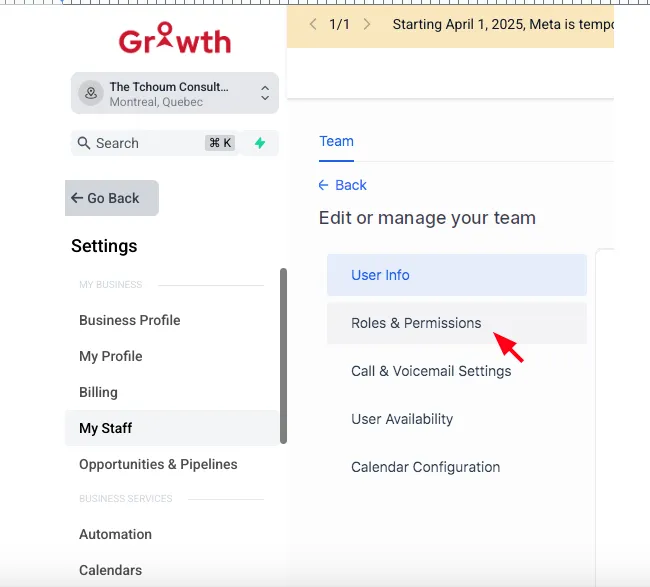
③ Set permissions for what areas they can access (e.g., conversations, contacts).
II. Setting up team collaboration tools
Use team collaboration tools:
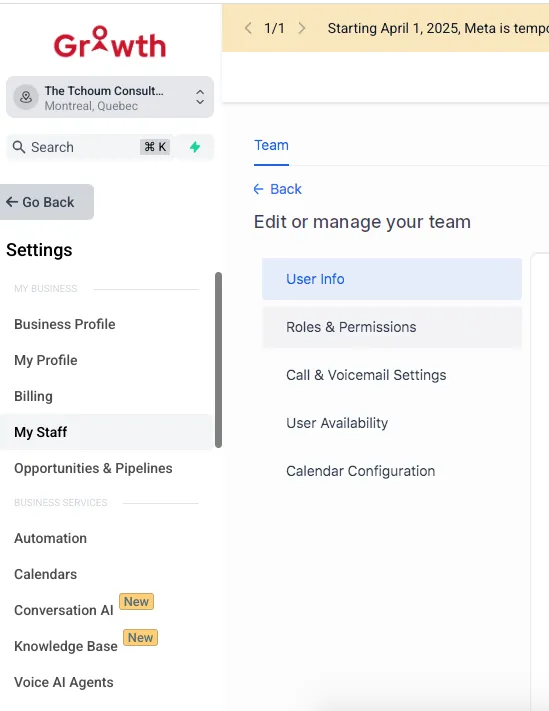
① Go to Settings > Team
• On the left-hand menu, scroll down and click on Settings.
• Then select “Team” from the available tabs.
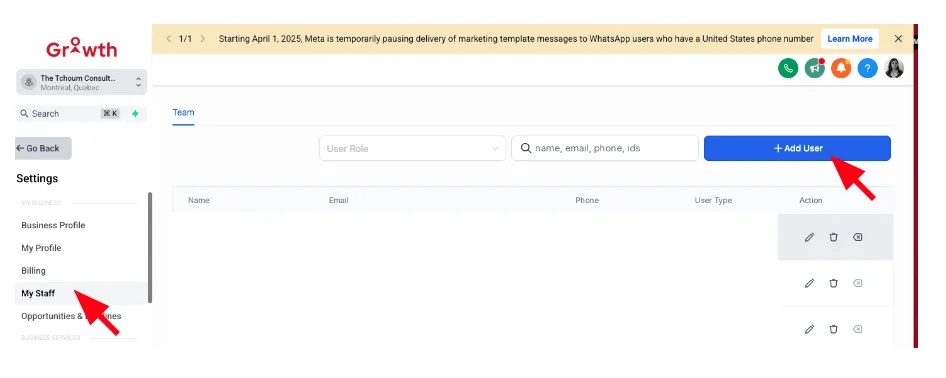
② Click on “+ Add User”
The dashboard serves as your central hub to manage all aspects of your CRM. Key sections include:
• You’ll see a list of current team members.
• Click the “+ Add User” button (usually top right).
③ Fill Out Employee Details
You'll be asked to complete:
• Full Name
• Email Address (this becomes their login)
• Phone Number (optional) Password (you can set one, or let them set it via the invite)
• Password (you can set one, or let them set it via the invite)
• User Role: ****
Usually options include:
Admin – Full access
• User – Limited access
• Account Manager / Sales / Custom – If roles were preconfigured
④ Save and Send Invitation
• Click “Save”, and optionally check “Send Invite” to email them a login link.
III. Managing tasks and appointments
① Managing Appointments
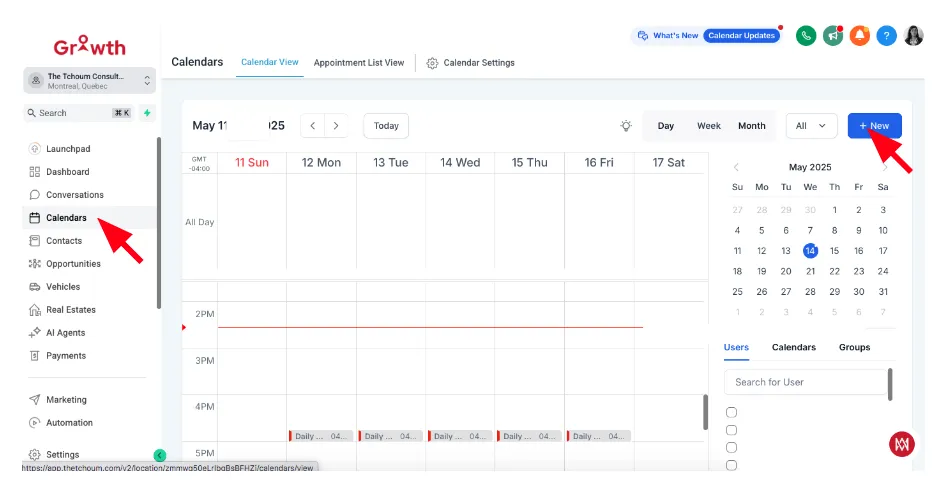
Step 1: Go to the Calendar Tab
• From the left sidebar, click on Calendar.
• You'll see a daily/weekly/monthly view of scheduled appointments.
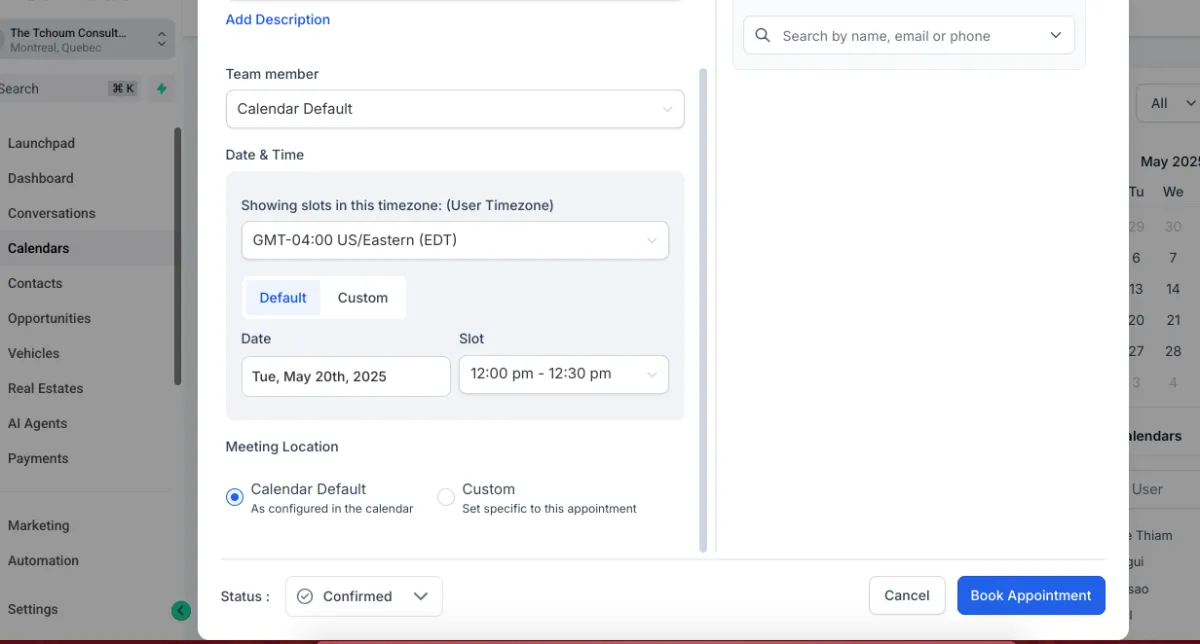
Step 2: View or Create Appointments
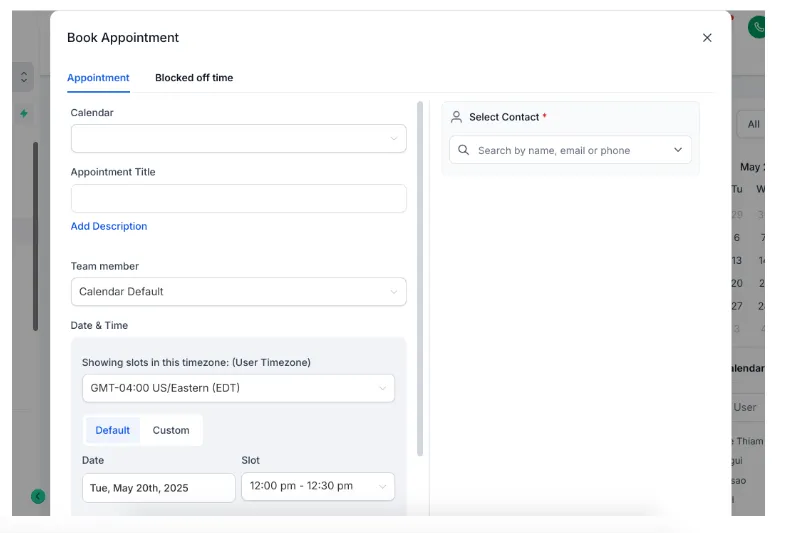
• To create: Click on a time slot or use the “+ New” button.
Fill in:
• Contact name
• Time & date
• Assigned team member
• Location (e.g., Zoom, in-person)
• Add notes if needed
Step 3: Manage Appointments
• Reschedule by dragging the appointment.
• Click on any event to edit, cancel, or mark as completed.
• Appointments are also linked to Workflows (e.g., send reminders, confirmation emails).
② Managing Tasks
Step 1: Go to Opportunities or Contacts
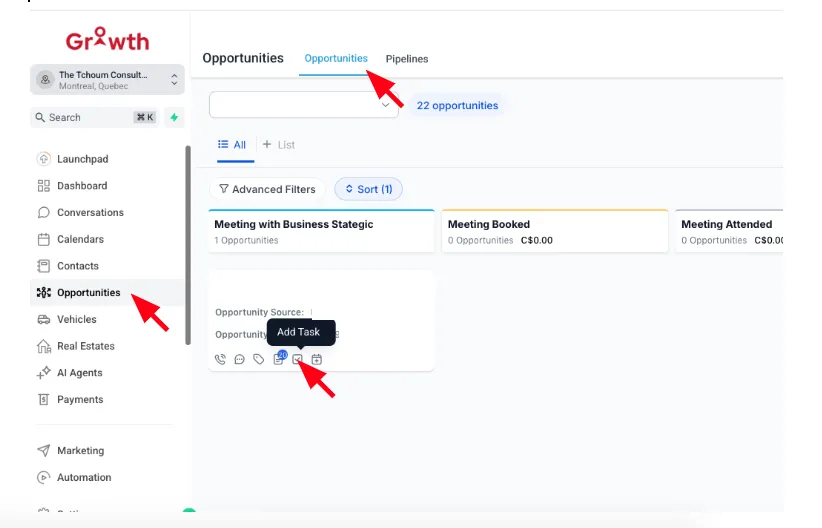
• Tasks are often tied to contacts or leads.
• Go to a contact profile or pipeline card.
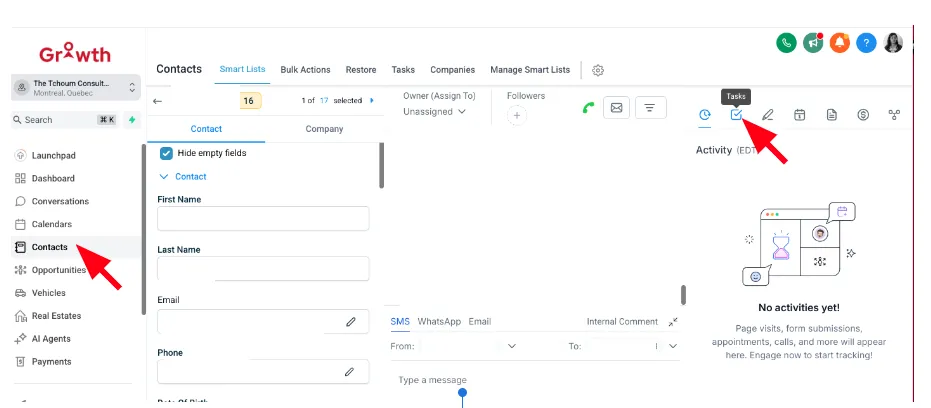
Step 2: Create a Task
• Inside a contact’s profile or card:
• Click “+ Add Task”
• Enter:
• Task name (e.g., “Follow up call”)
• Due date & time
• Priority (High/Medium/Low)
• Assigned to (if you have a team)
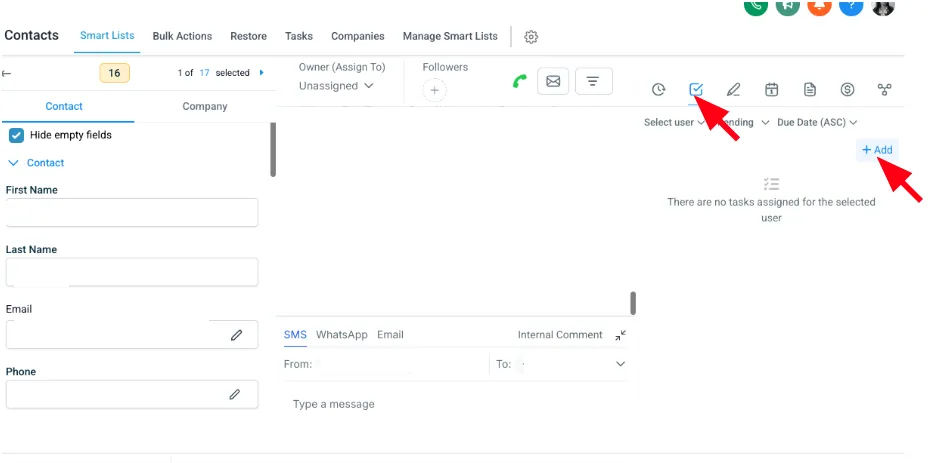
Step 3: View and Complete Tasks
• Tasks can be viewed in:
• Contact profile
• Pipeline card
• "Tasks" Tab (if available in your view)
• You can check off tasks as completed and add notes for future reference.
IV. Assigning conversations to team members
Assign conversations:
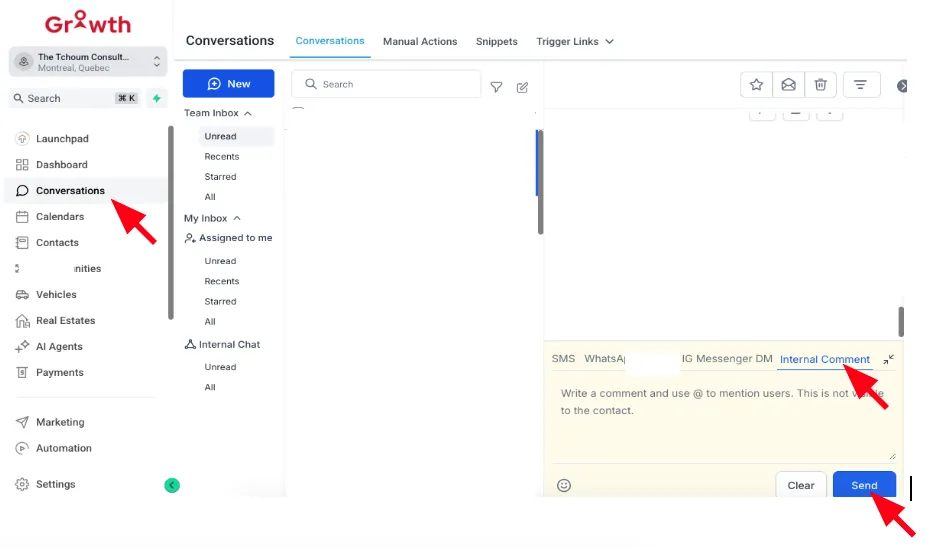
① In the Conversations inbox, select a conversation.
② Click "Internal Comment" and choose the team member you want to assign the conversation to by using "@".